

This document provides step-by-step configuration instructions for achieving 100% auto-posting in Business Central Finance. These setups are based entirely on standard BC features and do not require custom development. Each step is accompanied by relevant screenshots to help functional teams configure the system effectively.
1. Configure Posting Groups
Go to ‘General Posting Setup’ and map Customer/Vendor/Item/GL accounts appropriately. This ensures automatic account selection during transactions.
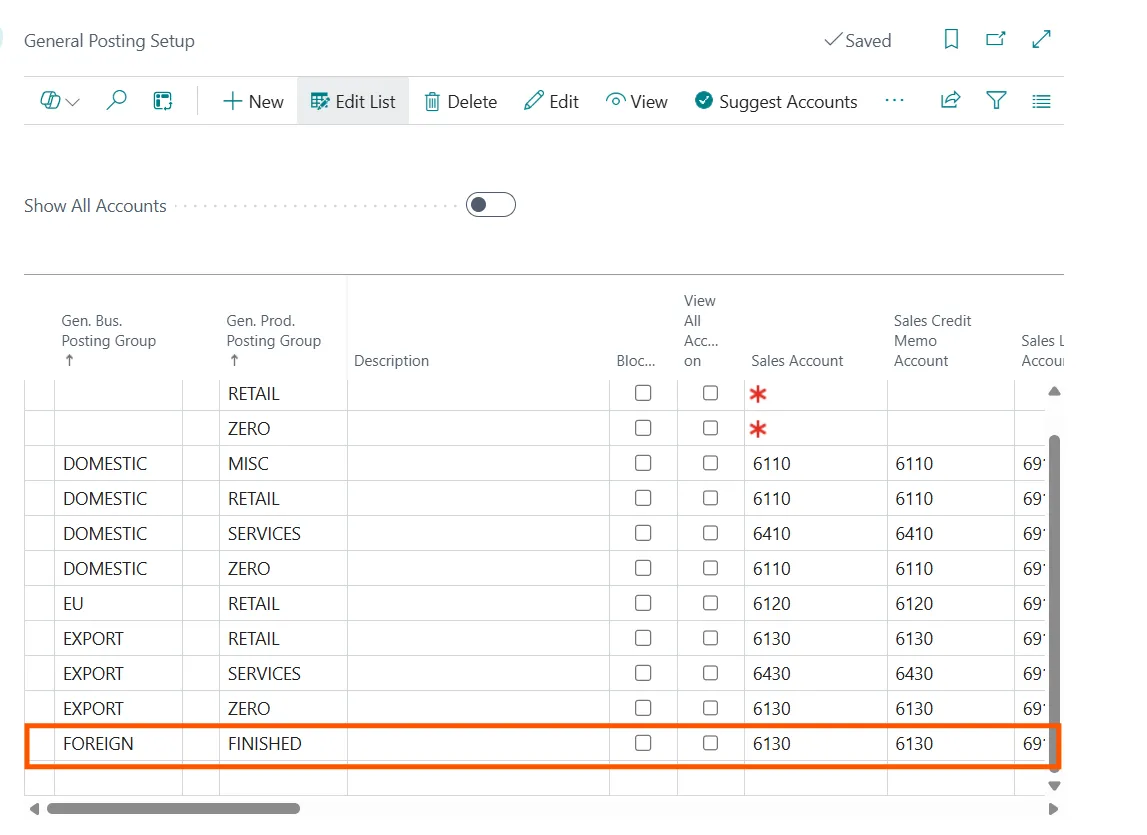
Here I have created general business posting group as a Foreign and same as a product posting group. Then after define the Sales, Purchase and COGS account for the posting Purpose.
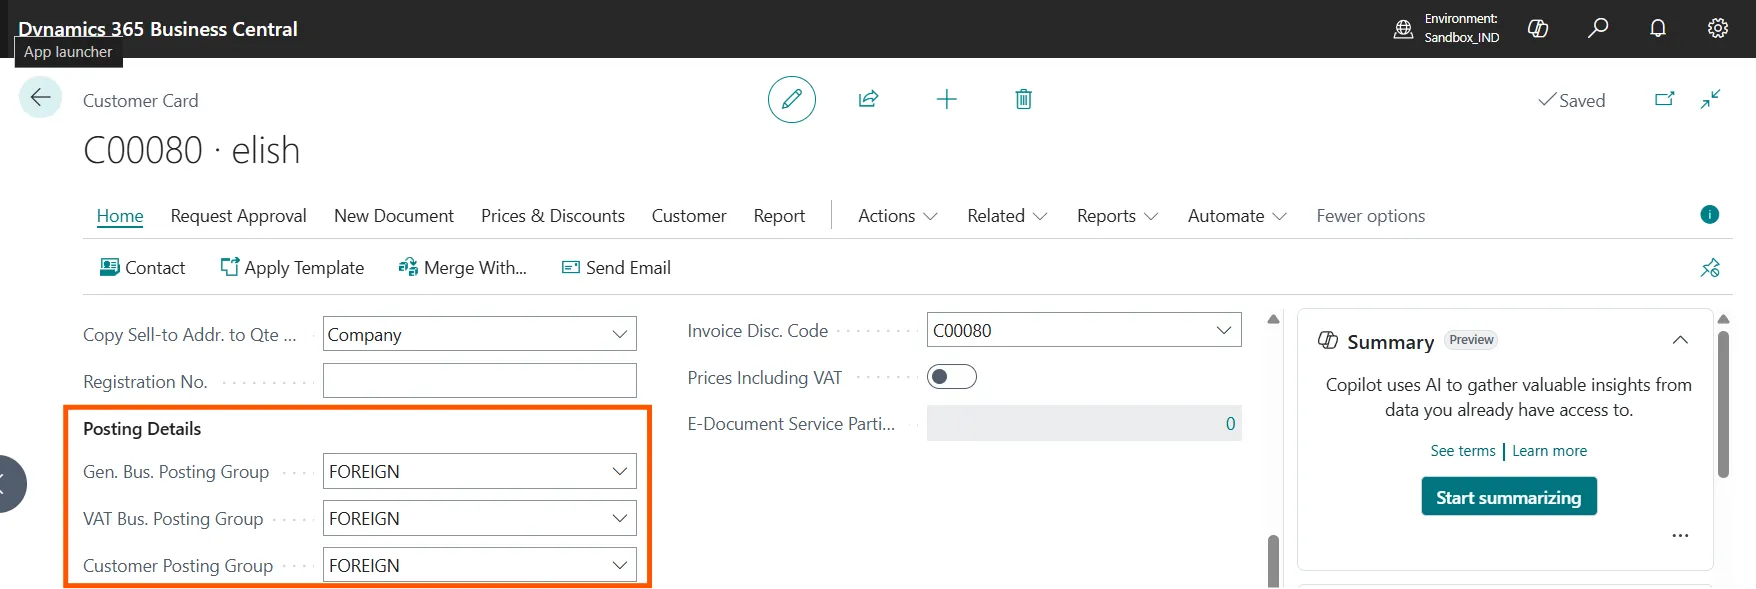
Mention the same details in the customer card.
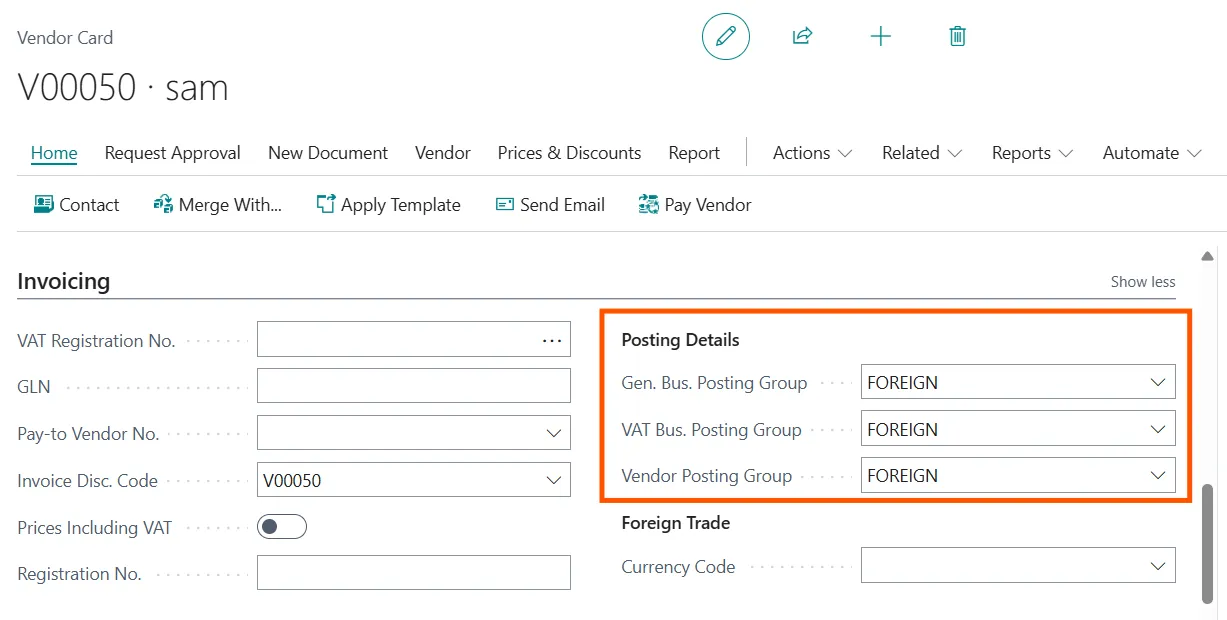
You can see the above picture, where general business posting groups, VAT Bus. Posting Group is defined as a Foreign in the vendor card.
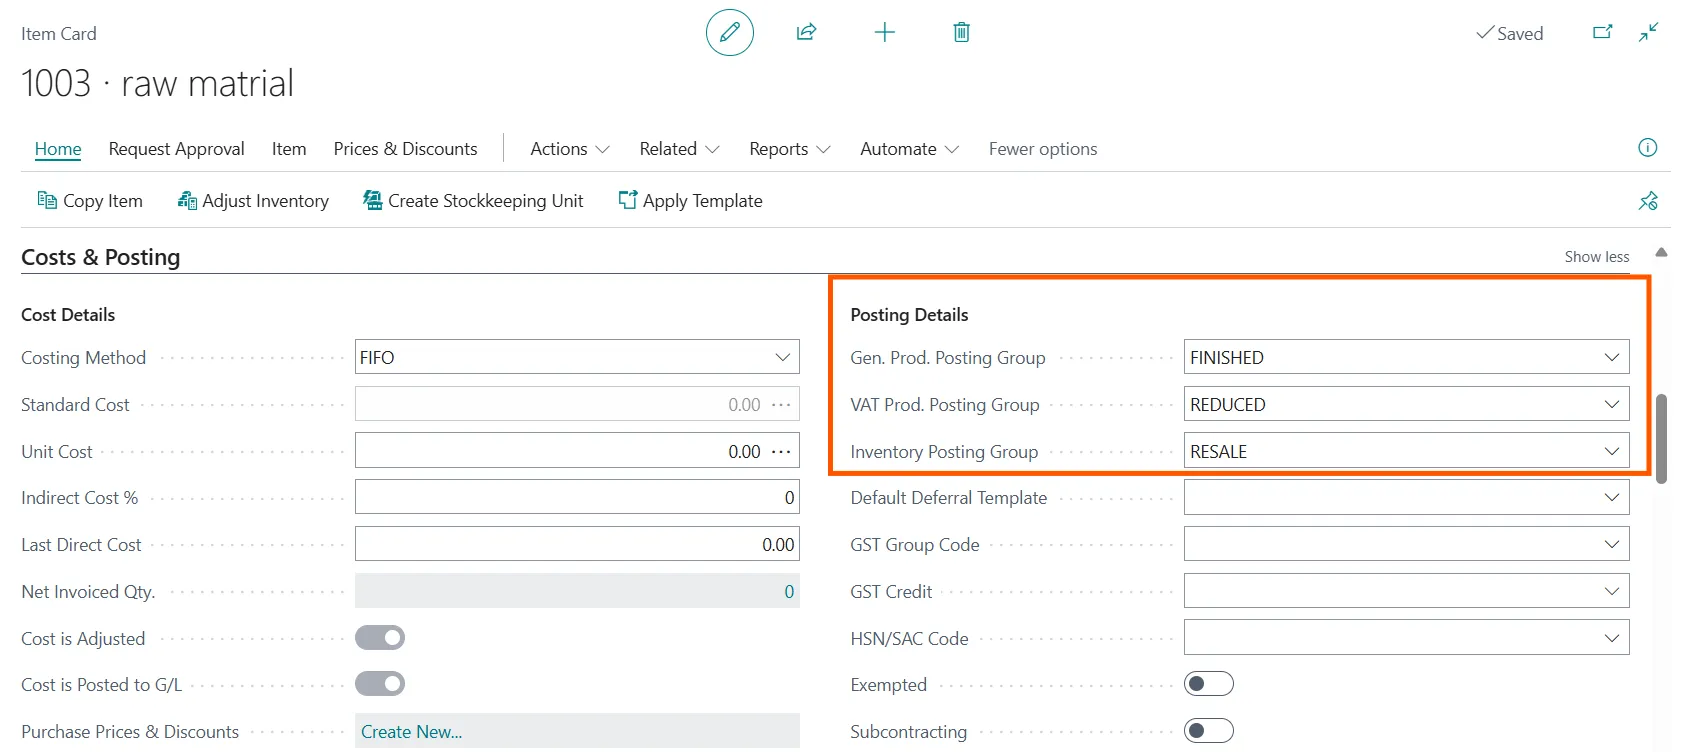
In the item card, we need to mention Gen. Prod. Posting Group as a finished and VAT Prod. Posting Group as a reduced to linked the posting details with Customer and Vendors.
2. Assign Default Dimensions
Navigate to ‘Dimensions > Account Type Default Dimensions’. Apply mandatory dimensions to GL Accounts, Customers, Vendors, and Items. Set ‘Code Mandatory’ to enforce automated population.
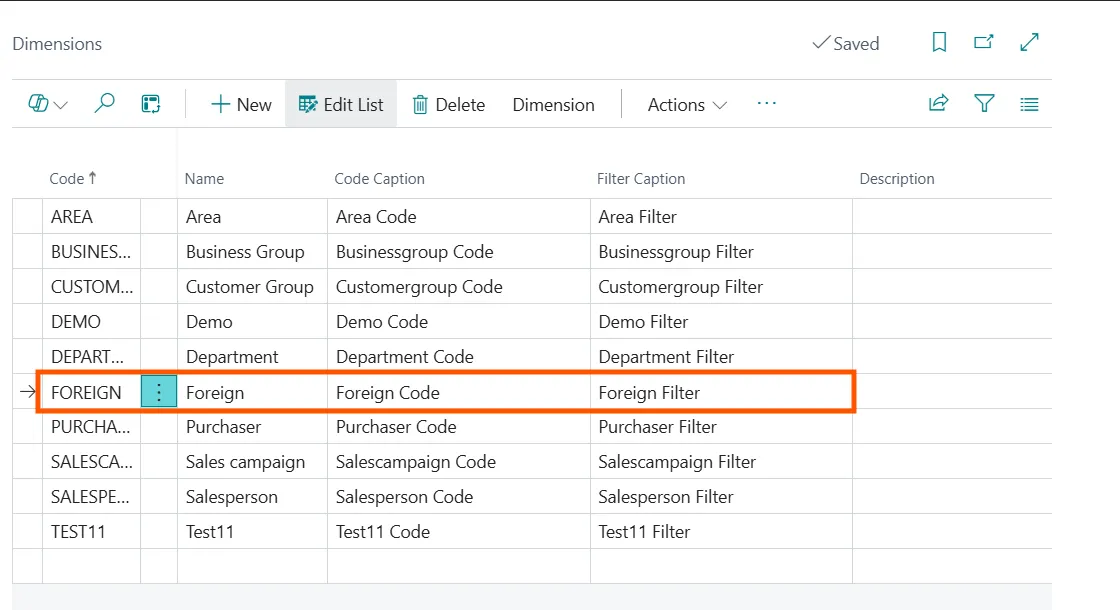
Here I have created one dimension as a foreign and also created some values like Cus, Vend, Item etc.

Value Posting must be Code Mandatory in the customers, vendor and item card. To automate the entries, we need to define value in the respective masters and value posting.

3. Enable Auto-Posting from Submodules
In ‘Sales & Receivables Setup’ or ‘Purchases & Payables Setup’, enable Shipment and Receipt on Invoice.
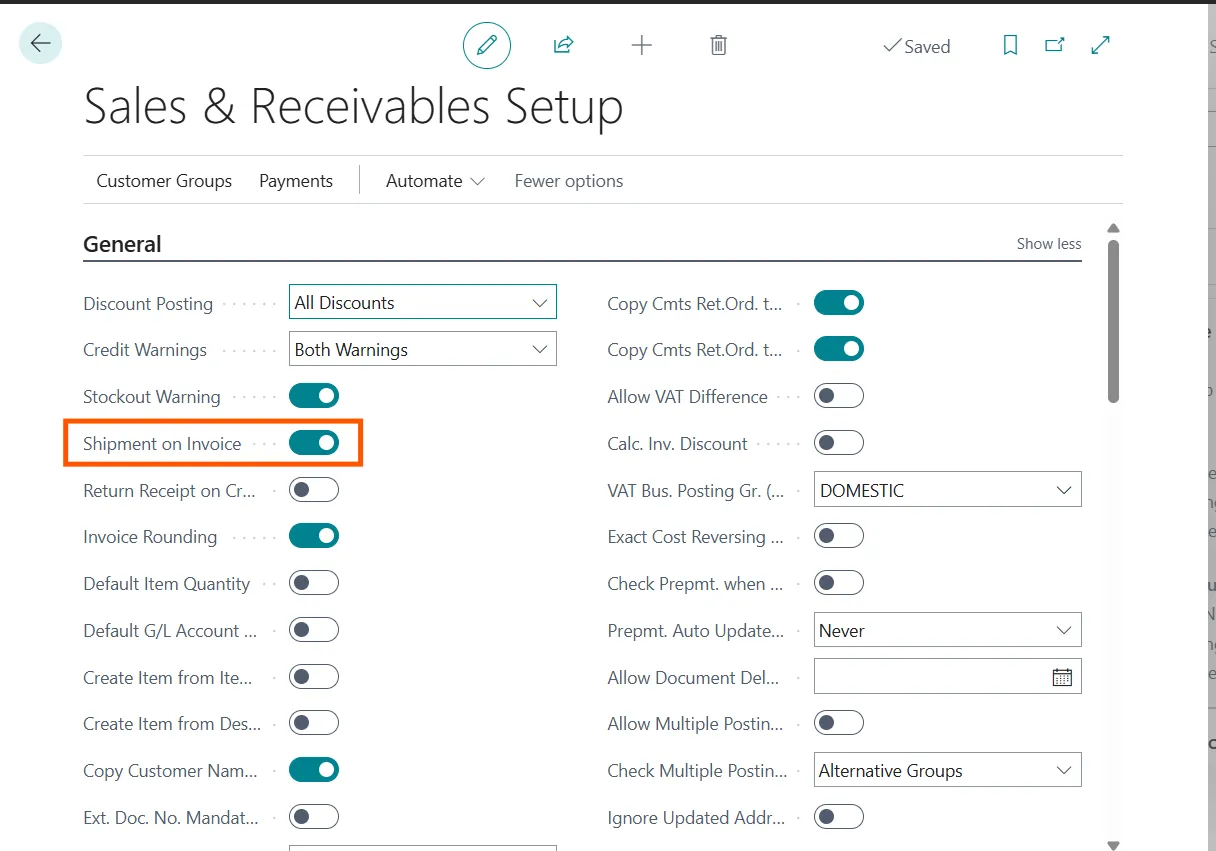
When enabled, it allows users to post a sales invoice and shipment together in one step.

Enable Receipt on Invoice Boolean for this process. When you generate the invoice, system automatically create receipt.
4. Create Job Queue Entries
Open ‘Job Queue Entries’, create a new task to post journals or execute reports. Schedule it to run daily, weekly, or monthly as needed.
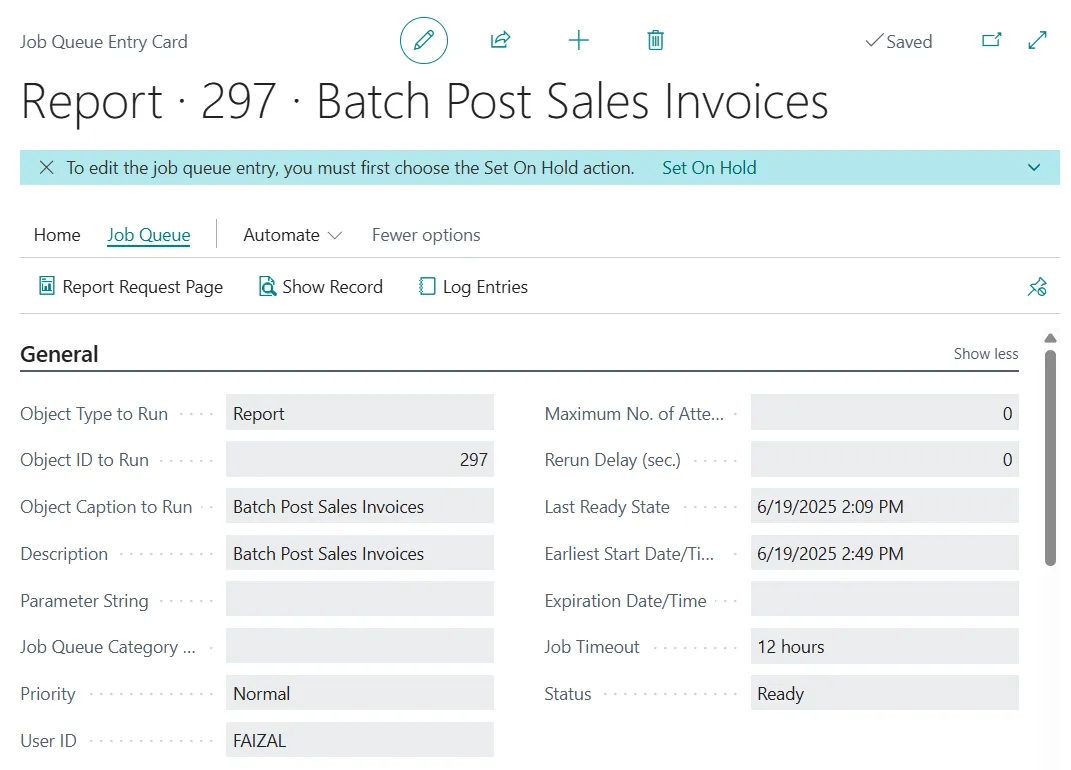
Here I have created job queue for the sales module, purchase module also working same.

5. Use Journal Templates
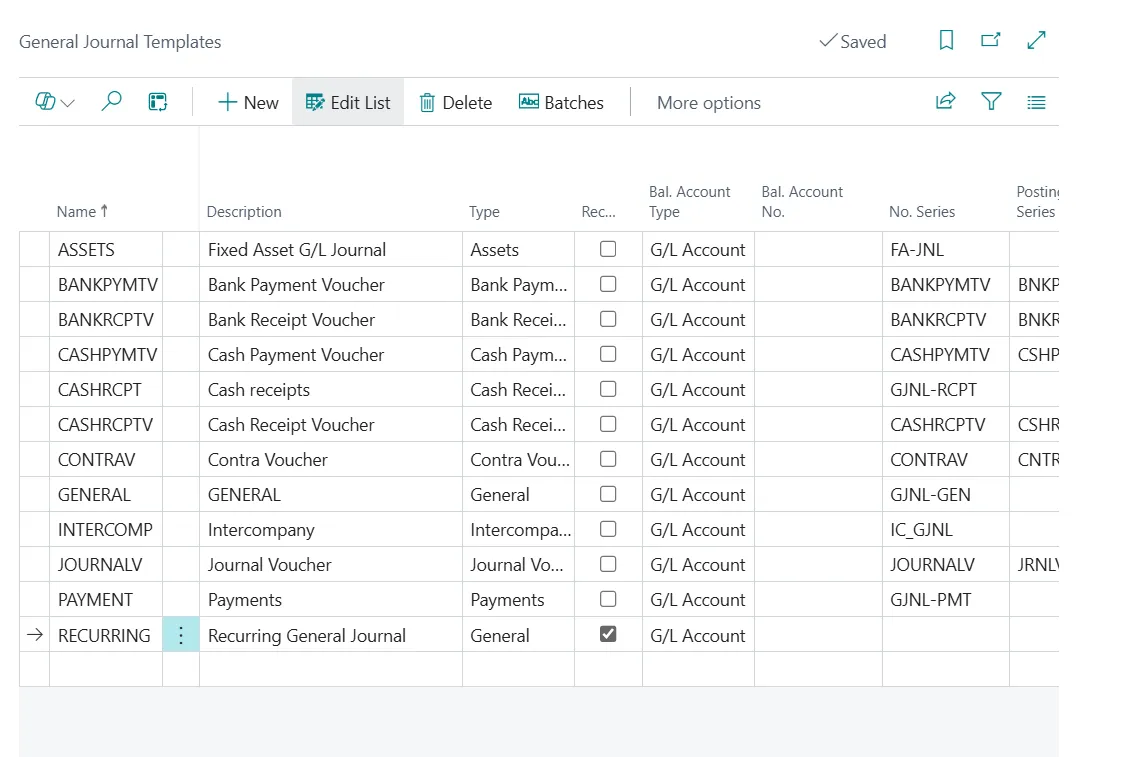
Create reusable ‘General Journal Templates’ to prefill fields and reduce manual effort. Link templates with batches for recurring use.
6. Monitor Using Change Log
Enable ‘Change Log Setup’ for Journal and Ledger Entry tables. Use this for auditing and to trigger Flow alerts if manual entries are made.